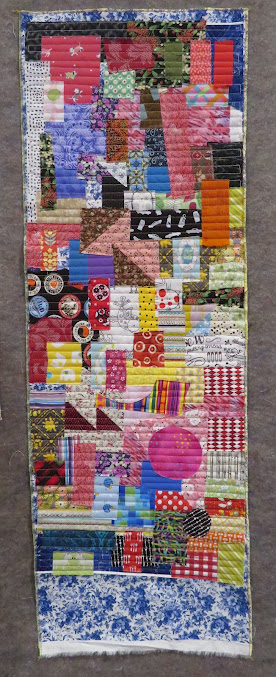
This is not a Kawandi. It did use up some of my scraps, however. I love how it looks, but I know when I wash it there will be threads galore.
This is one side of my pillow case. It has a travel sized pillow form inside. I started by measuring the width of the pillow and adding about 1/2", then I cut it from WOF, then lay the pillow on it and rolled it end-over-end to determine the length. I left about five inches extra on one selvedge end, for the piece you tuck over the end of the pillow, once you put it in there. Then I made a backing the same size, from the same fabric and I cut the batting about 6"shorter. I sandwiched them and adhesive basted the layers, so they would not shift while I added all the raw-edged scraps on top while I quilted back and forth.Then I surged around three sides. This is what it looked like before I folded it to make the pillow case.
This photo shows the back side aka inside. I just sewed down the two sides that have pins, and it was finished! The selvedge edged flap will be on the inside, once it is turned right-side out. SMILEY FACE!!This is the other side of my pillow. Once I got started sewing the quilting lines, with my walking foot, it went pretty fast. All the pieces are raw edged. Some have selvedge edges on them, some are flannel, some are batiks, but all are scraps, some from Jane's recent Hatchi quilt tutorial. Just click on any photo to enlarge it.


No comments:
Post a Comment