While we were enjoying a leisurely week at Lake Walcott State Park, I pulled out the sewing machine and worked on my latest art quilt project. I prepared the backing and batting before we left on our adventure, and I cut some chunks of fabrics I thought would work. This way I kept the amount of fabric to a minimum. I decided I would have to use whatever I took with me, so there would be no excuse to buy more fabric at my favorite quilt shop. My favorite quilt shop is The Gathering Place in Rupert.
I was outside, under the huge Cottonwood tree, pressing my sun rays, when the gal from the next RV came over to visit. She had noticed I was pressing fabric and came to chat about quilting. She was from Twin Falls and also a quilter. It is amazing how we can go here and there and not even know that some of the strangers around us are also quilters, birders, or what-have-you. I did get my project about one-third quilted before we headed home, so there was not that much left after we got back. This is not my first landscape, however, I have not done one in about twelve years. I really like this one, because we sure need something cheery in our lives at this moment in U.S. History.
Tuesday, June 24, 2025
Wednesday, February 12, 2025
Painting on Fabric with Acrylic
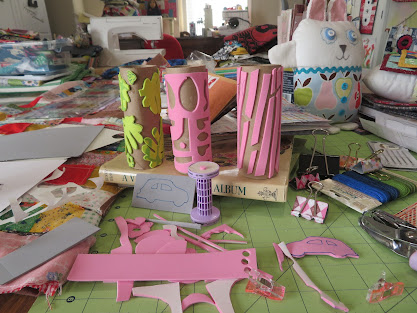
My quilt studio looks like it was hit by a tornado.
I blame it on my friends who keep inspiring me to experiment with new and diverse things. Besides continuing to use scraps to make art quilts, I have started making texture tags, stab books with found papers, and using acrylic paint to make my own fabric designs. I thought my acrylic paint days were pretty much over, except for painting the odd doll table or chair, so I was way down on my supply. I had to go buy some acrylic paint, but it was well worth it.
There is a tutorial on YouTube, by Deborah Boschert, that inspired my thorough attempt at painting on fabric with a paint roller and toilet paper tubes. See her amazing video here, Rolling Paint On Fabric, and do get hooked!
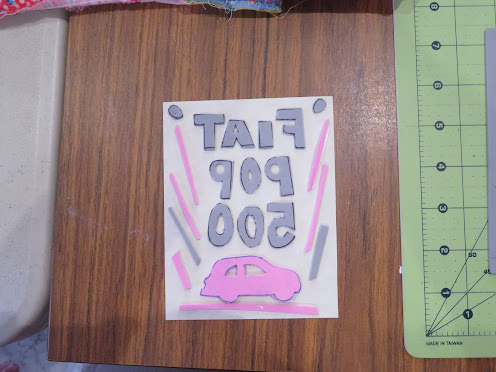
My crafty daughter is currently making tissue holders that can be hung in your car. They are amazing! She lives on the eastern side of the country. She wants to make me my own custom Fiat tissue holder, so I was tasked with designing my own fabric. I have sketched my Fiat before, but decided to do a new sketch, then I did another sketch based on the second sketch and took all the details out and made it much smaller. It is small enough to cut out of sticky-backed craft foam and adhere to a toilet paper roll.
I measured around the roll and made a paper template to place my design on. This way I know it fits before I stick it to the roll. I am glad I put those dots at the top, because they became a reference for placing repeats on the fabric.


