In January, I gave a presentation to a local quilt group. I discovered this method of putting frames (or borders) around blocks a couple years ago, when my friend, T, gave me a magazine that she was finished with. Reference Issue 5, 2016, of
Today's Quilter. I wanted to present it, here, in a slide-show, but the You Tube tutorials on slide-shows are extremely lacking. I wanted Marcia and some others to be able to see what I presented, as they could not be at the meeting. Here is my presentation:
Click on the photo, you can do a little slide show of the photos in this post.
 |
In her 'how-to' article I liked that she states, "The first rule of quilt making
is there are no rules - hooray!" On the next page, she goes on to state the
wrong and right way of piecing a 'door' type frame. |
I did quite a bit of experimenting with the off-set frames, and I came to the conclusion that there are four types of framing a block (or framing a quilt top) with borders:
- door frame type, as illustrated above
- mitered corners (or fake mitered corners)
- off-set frames
- use of cornerstones
When you design your project, you choose what you want for your quilt. If you want balance, then mitered, off-set, or cornerstones are the way to go.
 |
This is an example of a 'door' frame type of framing of a quilt block.
The "right way" is to sew the framing strips to the sides, then across
the top and bottom. But there are no rules, so if you want to do it the
other way round it may make a nice effect for your creation. |
 |
The block with the red & white diamond pattern show the off-set
frames type of framing. It give balance and the eye walks it's
way around the block, not being stopped where the seams meet. |
 |
Another example of off-set frame: these boots look like they are marching
circles around the fish. I like how it looks continuous and not disjointed. |
 |
Start by laying the center block on your gridded cutting mat. Lay the framing
strip next to it. You can see how long you need to cut your strips. 5" for safety. You can subtract the seam allowance, if you wish; making it 4.5". Cut four strips, all the same length. |
 |
Sew the top strip on first, leaving the last inch not sewn.
The hardest part is remembering not to sew to the end, but
that is why we have seam rippers! |
 |
I like to leave a little extra and trim when I have surrounded my block.
If you are into quilting math, read Lynn's formula for getting your strips
just the right length. |
 |
This is how the finished block looks. Solid colors really
make an impact, as you will see in the following slides. |
Now for a quick step-by-step of how to piece this block:
 |
Step 1: sew the top one first, and leave an inch left unstitched.
Press after each strip is added. Step 2: sew the left side on.
|
 |
Step 3: sew the bottom strip
Step 4 sew the right strip on; press the seam flat |
 |
Step 5: finish sewing the seam of the top strip to the block; you may need
to press it first, so it lays flat
Step 6: press the seams out; square the block up
and you have a nicely balanced, finished block |
 |
I used the off-set frame technique to make this wall hanging for my daughter.
It is not a square block in the center, but it works just the same way.
I did not want to incorporate too many skulls into this, so it worked perfectly! |
Notice, in the center of this photo, how the off-set frames create a weaving effect where the blocks come together. If you use bolder stripped fabrics around your blocks, this woven effect is much more pronounced than with the choices I used in this quilt. I was trying to use what I had in my stash, instead of heading out and buying more fabric.
Even though those weaves at the intersections of the blocks are not hugely noticeable, I really love how this quilt turned out. The best fabric choices for accentuating the woven intersections are bold strips and plaids.
I used off-set frames to frame the bear blocks in this quilt. Looking back, I think if I had looked at the shade values of the different pinks I could have made a more striking window pane effect. Again, I went to my stash to locate the pinks I used in this quilt. A close-up of this quilt is on my previous post of Dec 31, 2017.
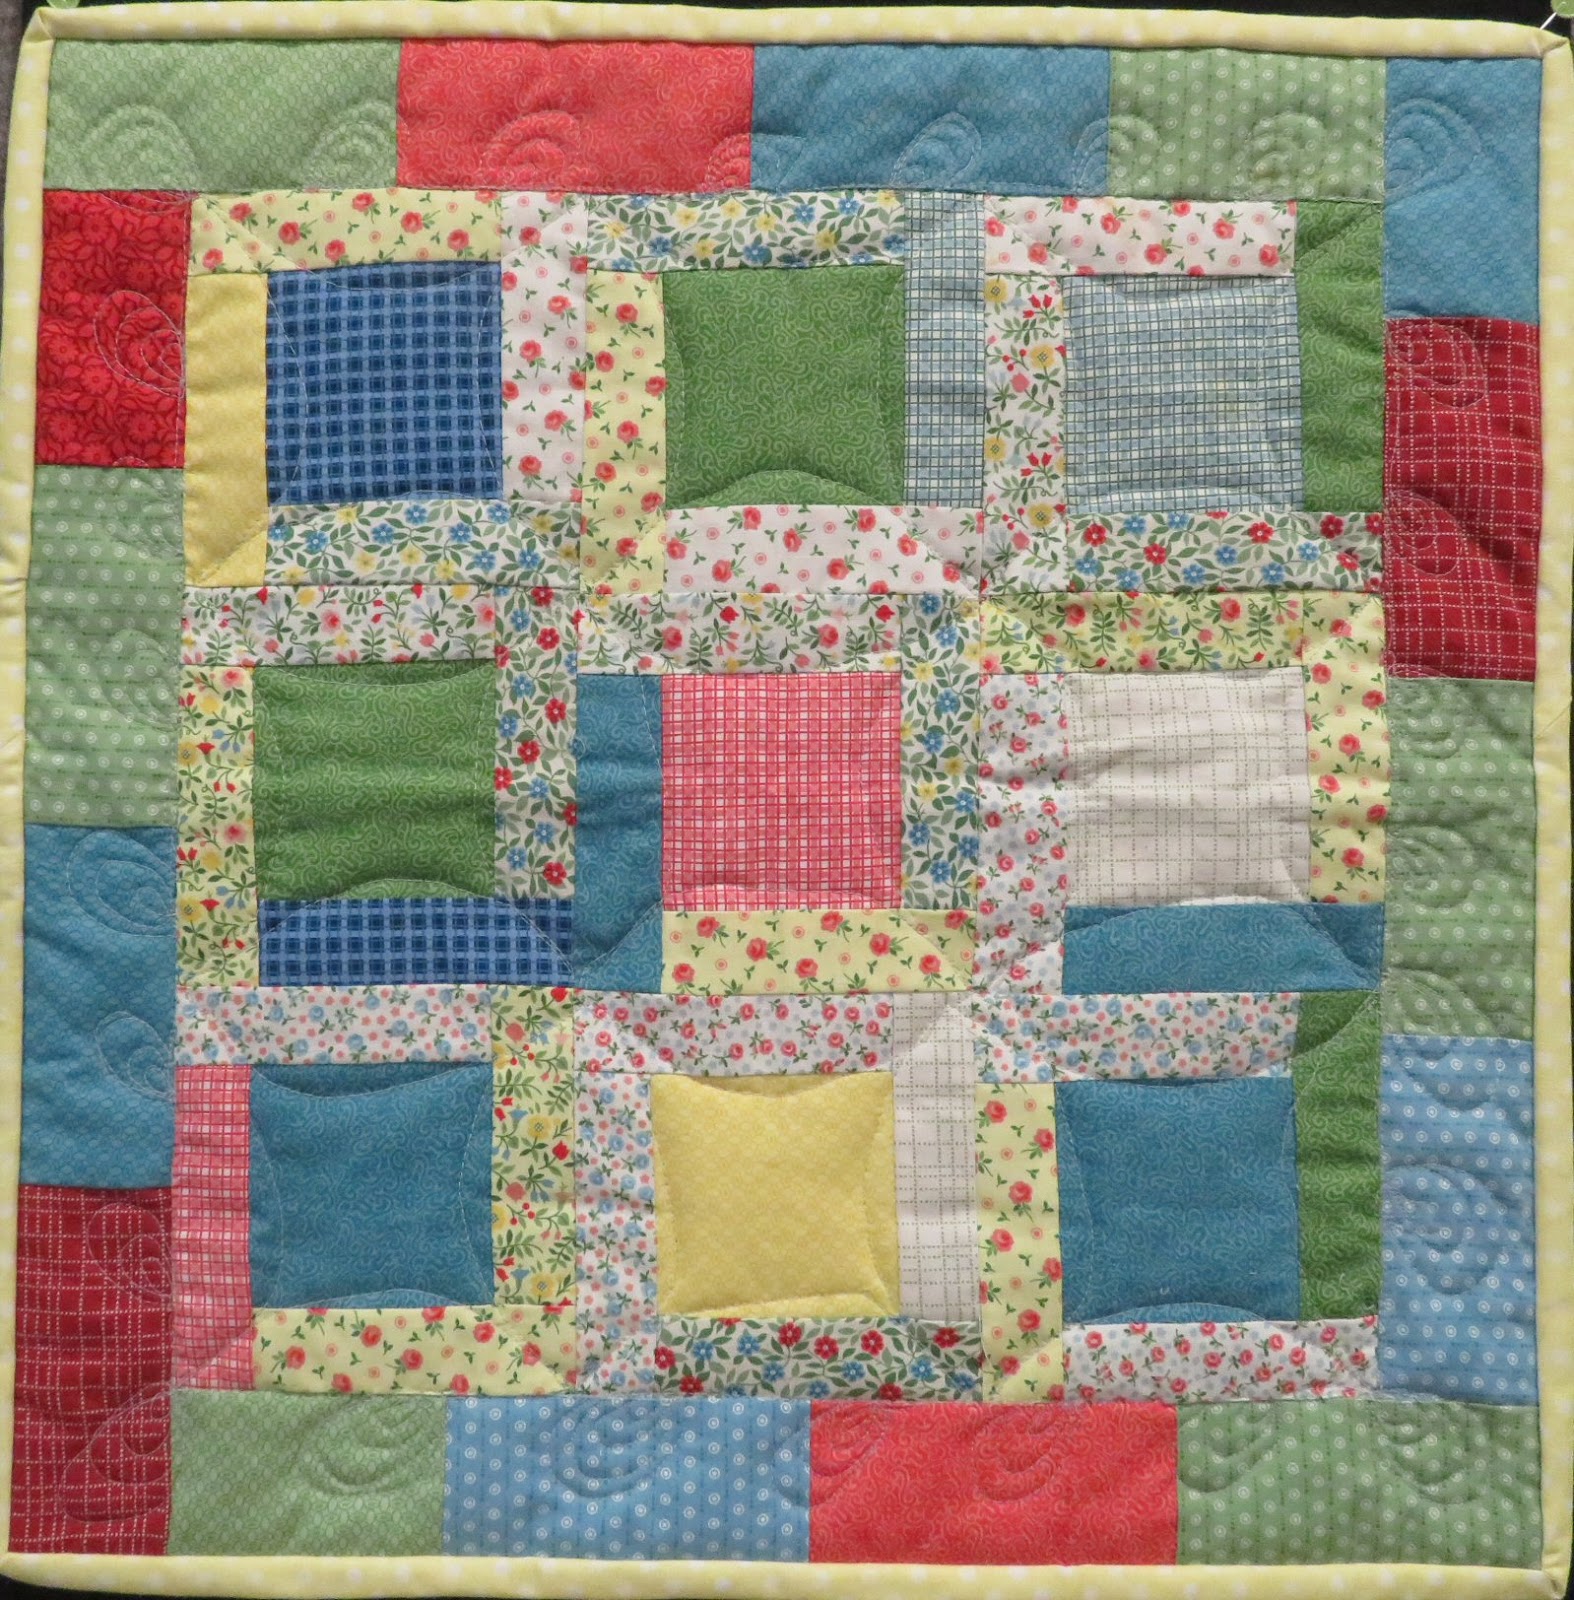
This quilt it a good example of balance. I used cornerstones between the blocks, then the inner and outer borders are done with off-set frames. It is not so noticeable that off-set frames were used, as that was the goal. I wanted it to look balanced and not have those "door frame" borders, which I think give quilts a choppy look. Sometimes I like the choppy look, but other times I do not. This quilt looks smooth and consistent and the attention is on the whimsical cats at the heart of the quilt.
This quilt has three borders in it. The orange inner border was pieced in the door frame method. due to the solid colors this works fine. Note the border surrounding the orange inner border was pieced with the off-set frame technique. Again, this was done 1) for balance and 2) for lack of longer strips to go across the top and bottom (should I have leaned toward door frames). The outer border has big tulip cornerstones adding continuity to the overall look of the quilt.
This is a quilt, my quilting niece made. It is made completely with the off-set frames technique, including the pieced outer border. If you look closely you can see them. I like this scrappy approach, and I did not readily notice it, when I first received it. It looks so 40s to me and I really like it.
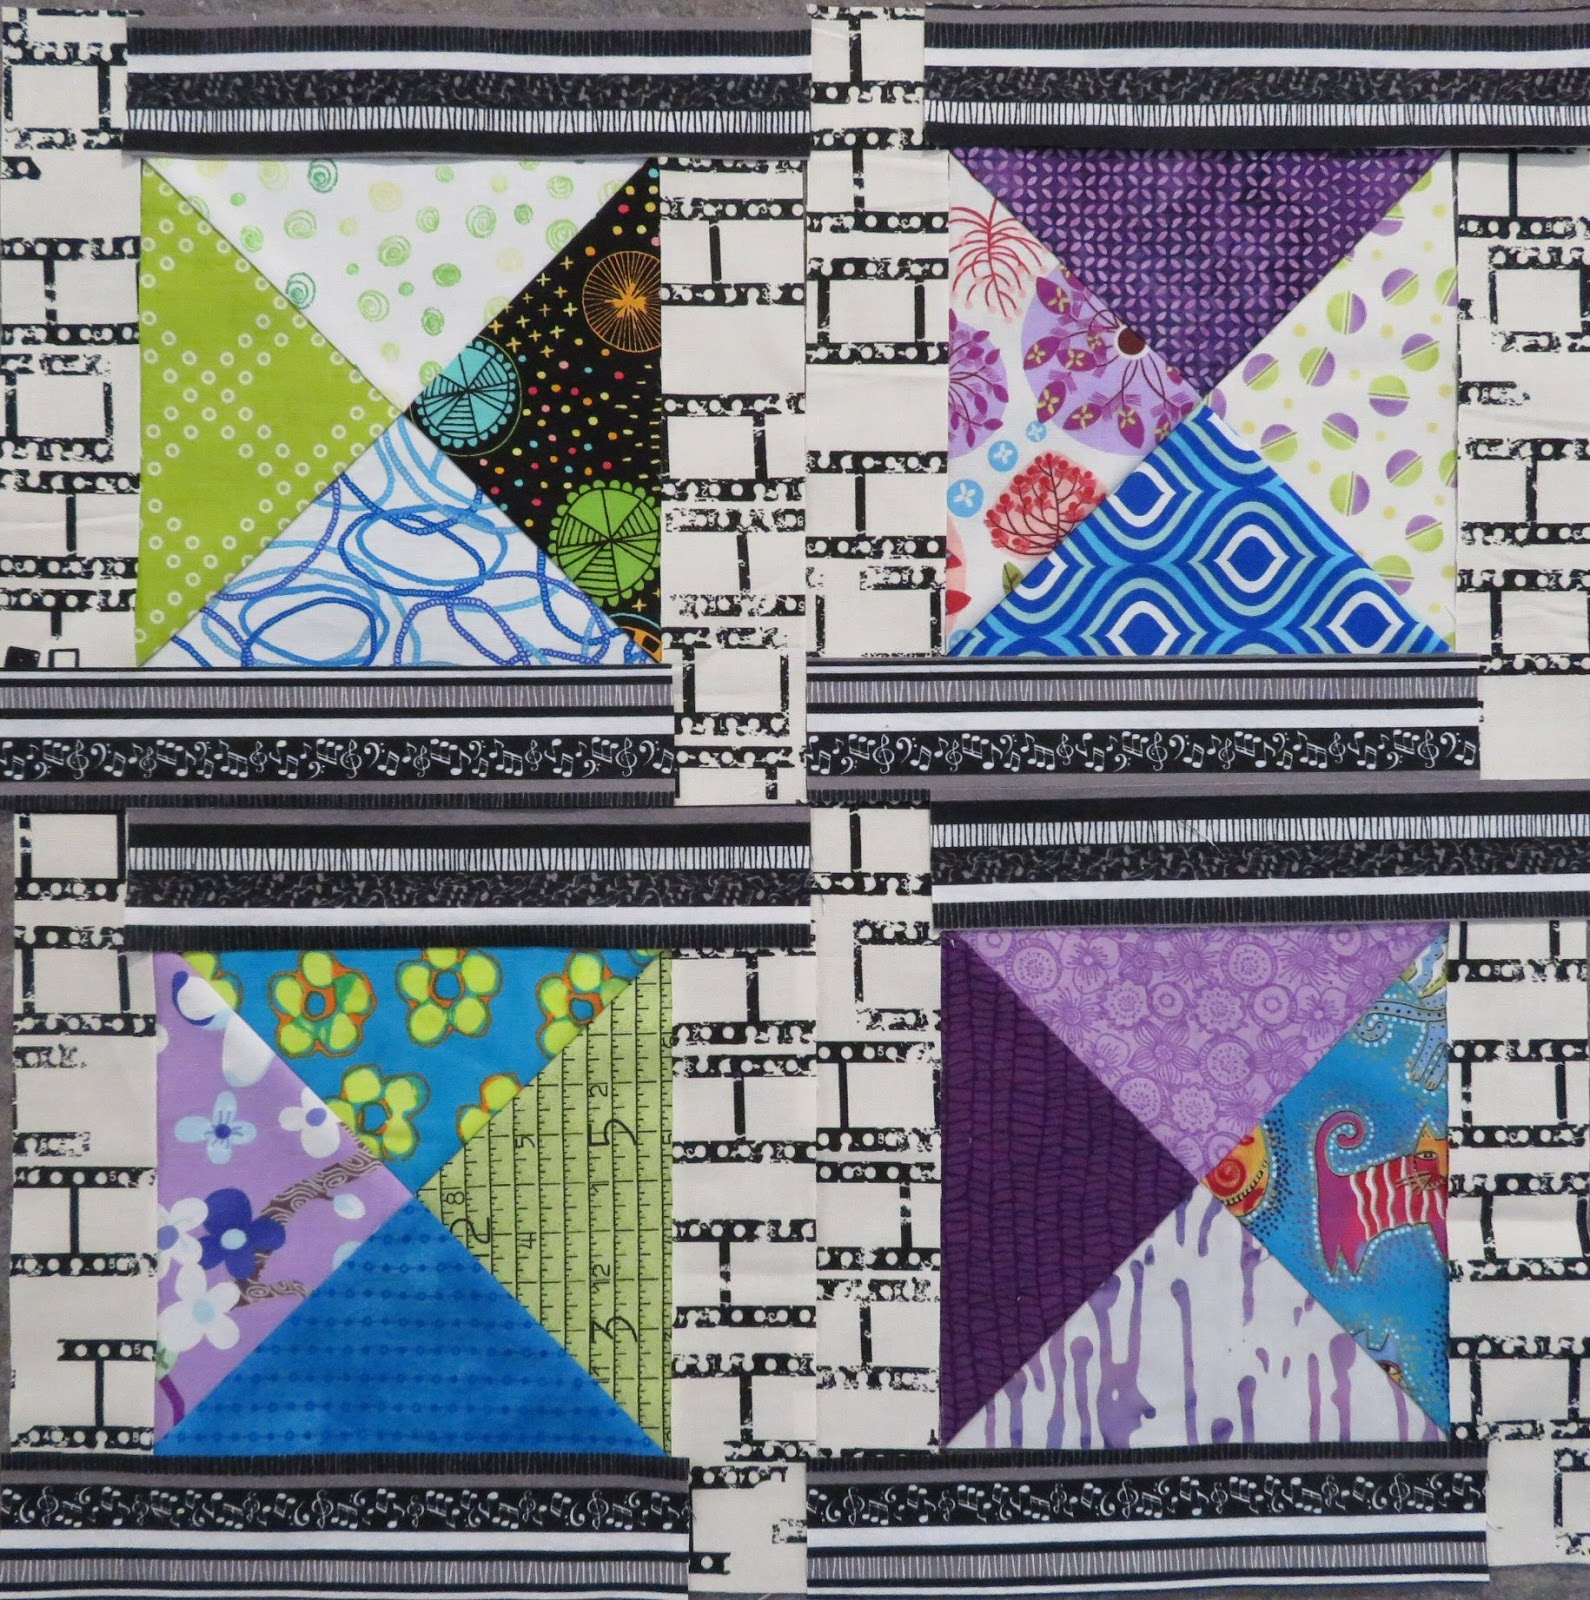
I made these blocks for my presentation. They are merely on my black design wall, but you can see the profound effect that solids have when using the off-set frames technique. This has made me add another quilt to my list of quilts to do, as I want to make a big quilt with solids against black with this type of framing (borders).
I did an experiment, with this technique, making log cabin blocks. I discovered, on traditional log cabin blocks, the upper left colors impede on the lighter area. If you lay your ruler across the block from upper right to lower left, you will see this to be true. If you surround the center block in the off-set frames technique, you have a block that is half dark and half light, again being more balanced. Look at the lower left of both blocks to see the difference.
Thank you for reading and viewing my presentation. Now I have to decide what to do with these two log cabin blocks, because I have run out of the outer swirly blue fabric and only had a fat quarter of the bicycle fabric . . . I guess it is time to make another fab bag!